Optimize the Drawing
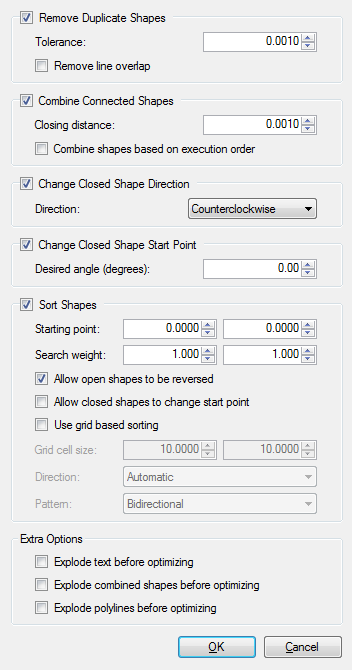
- In the Project ribbon, select Optimize Project. Shapes in the same group are optimized only in relation to each other. The Optimization Options dialog comes into view.
- Configure the options. For information about each option, refer to Optimization Options.
- Click OK to start the optimization.
After the optimization completes, the shapes might be redrawn on the canvas. You can see the status and the results of the optimization in the operation log.
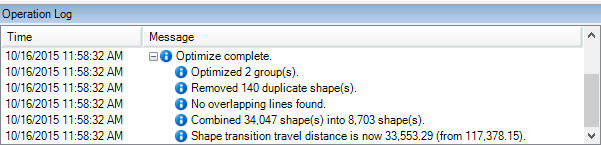
The total shape transition travel distance before and after optimization shows in the operation log. This distance measures only the linear distance between two shapes. It does not use the actual distance that the axes might travel, such as when a G0 command is not a straight line, or when you are skywriting.
NOTE: After you optimize your drawing, you can manually change the order that was configured. Refer to Change the Order of Execution.