Homing Topic
Use the Homing topic to configure the homing-related parameters. You can also select the home type, do gantry alignment, and configure the home location and cycle. This topic and its
IMPORTANT: When you use a helper module to edit parameters automatically, make sure you are in Basic Editing mode. To edit parameters manually, click Go to Advanced Editing on the top right of the Configure workspace.
Homing Module
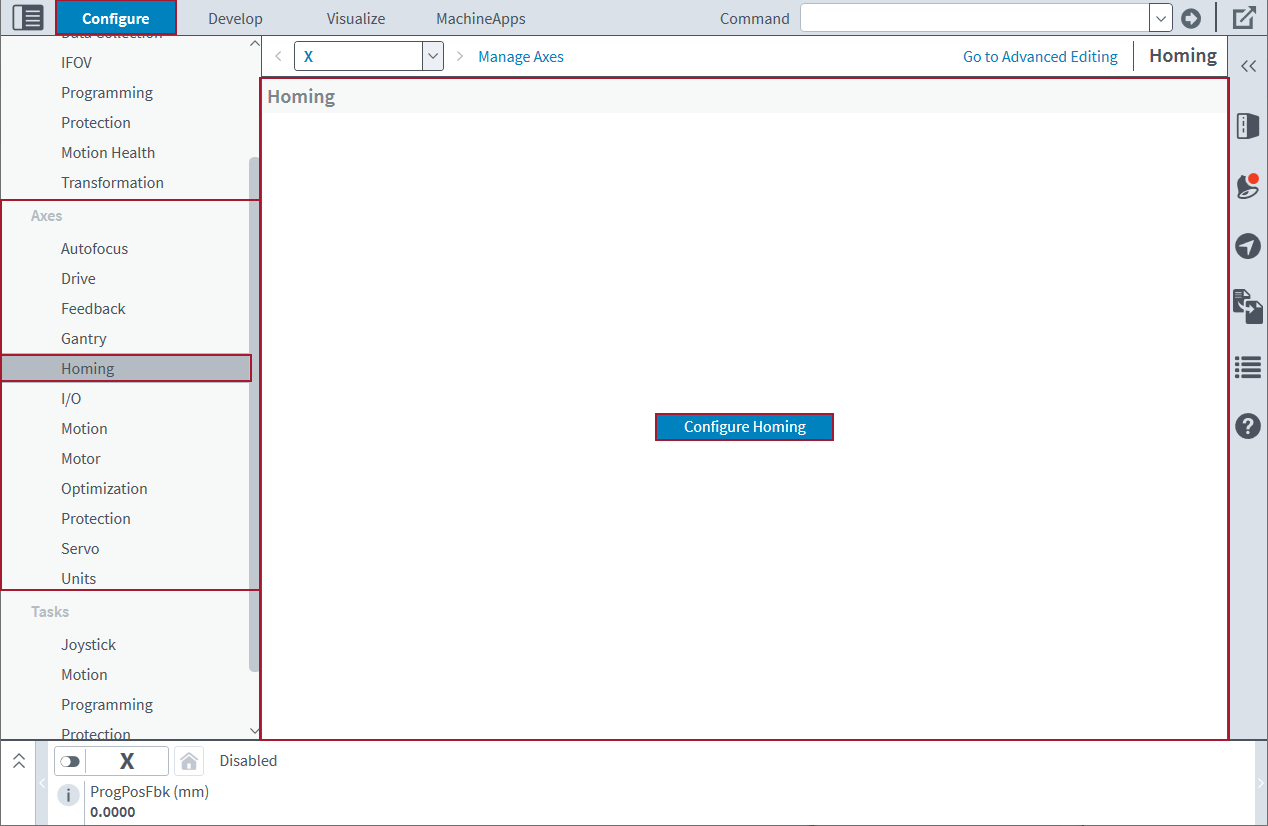
Use the Homing module to configure the homing parameters for the selected axis. Use this module with axes that you configured with Machine Setup. Click the Configure Homing button to start. To use this module, make sure that you are in the Basic Editing mode.
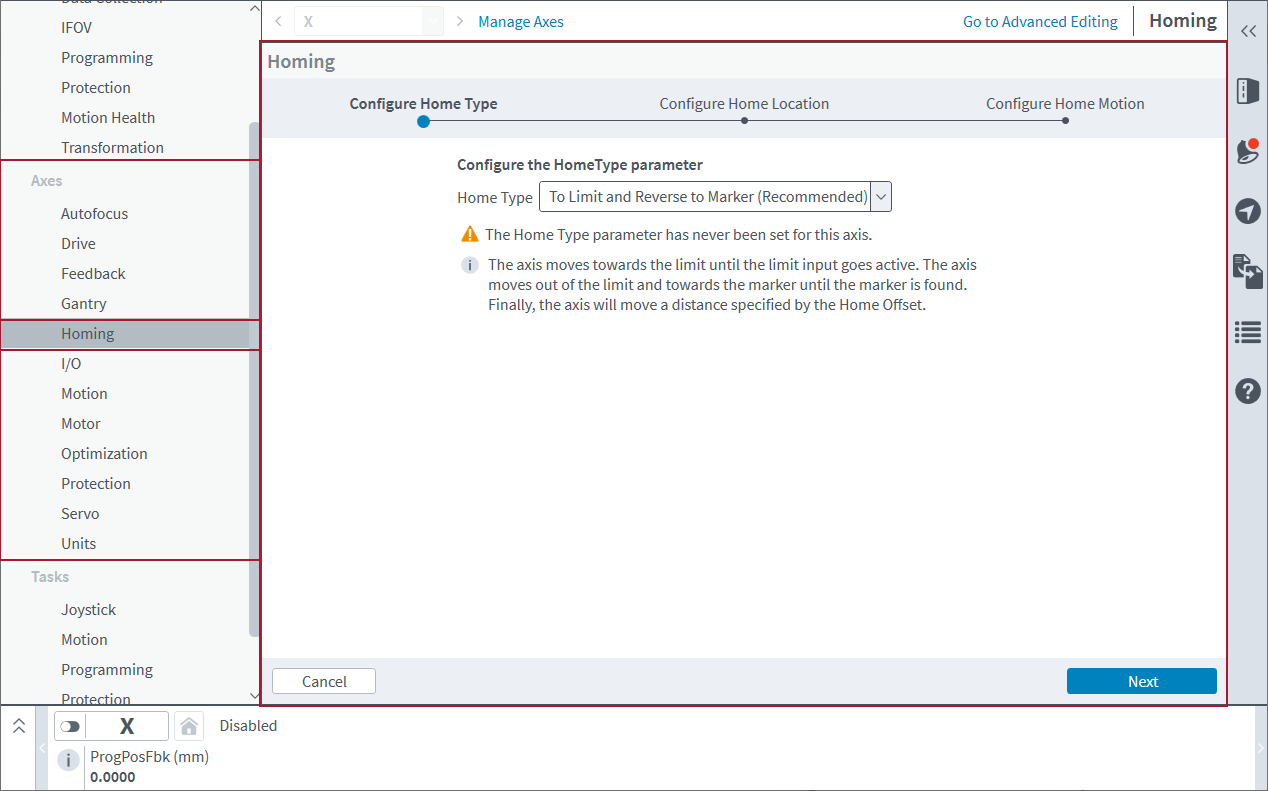
Configure the Home Type
The Homing module automatically selects the recommended home type for your axis. To use a different home type, select it in the HomeType drop-down in the Advanced Editing mode.
If you are homing to an end-of-travel limit or a homing input, the Limit Type drop-down comes into view. Use the Limit Type drop-down to select which input to use for homing.
Do Gantry Alignment
IMPORTANT: This step is available only for gantries that use Decoupling Control.
To use the gantry under Decoupling Control, you must use the Gantry Alignment step to measure the home marker location of each spar and correctly configure the logical Yaw (Theta) axis home offset.
The Homing module will guide you through each step of the procedure.
-
Manually move the gantry axis. Do one of the options that follow:
- If you are using a Linear (R) gantry axis, manually move it to the approximate center of travel.
- If you are using a Flexible gantry, manually move the Yaw (Theta) gantry axis to the approximate center of travel.
-
If you are using incremental feedback, set a temporary value of the maximum current clamp that will be used during the alignment. Click the Edit link to use a value that is different from the suggested default.
-
Click the Start button to start the alignment. The controller does a partial home on the gantry axes. It stops after it measures the two marker positions and calculates the Yaw (Theta) home offset. The calculated Yaw (Theta) HomeOffset parameter is applied to the active controller, but the parameter change is not automatically saved to the Machine Controller Definition (MCD) file.
-
To keep these parameter changes active after the next controller reset, you must save them to the controller. Click Save All on the left panel of the Configure workspace.
Configure the Home Location
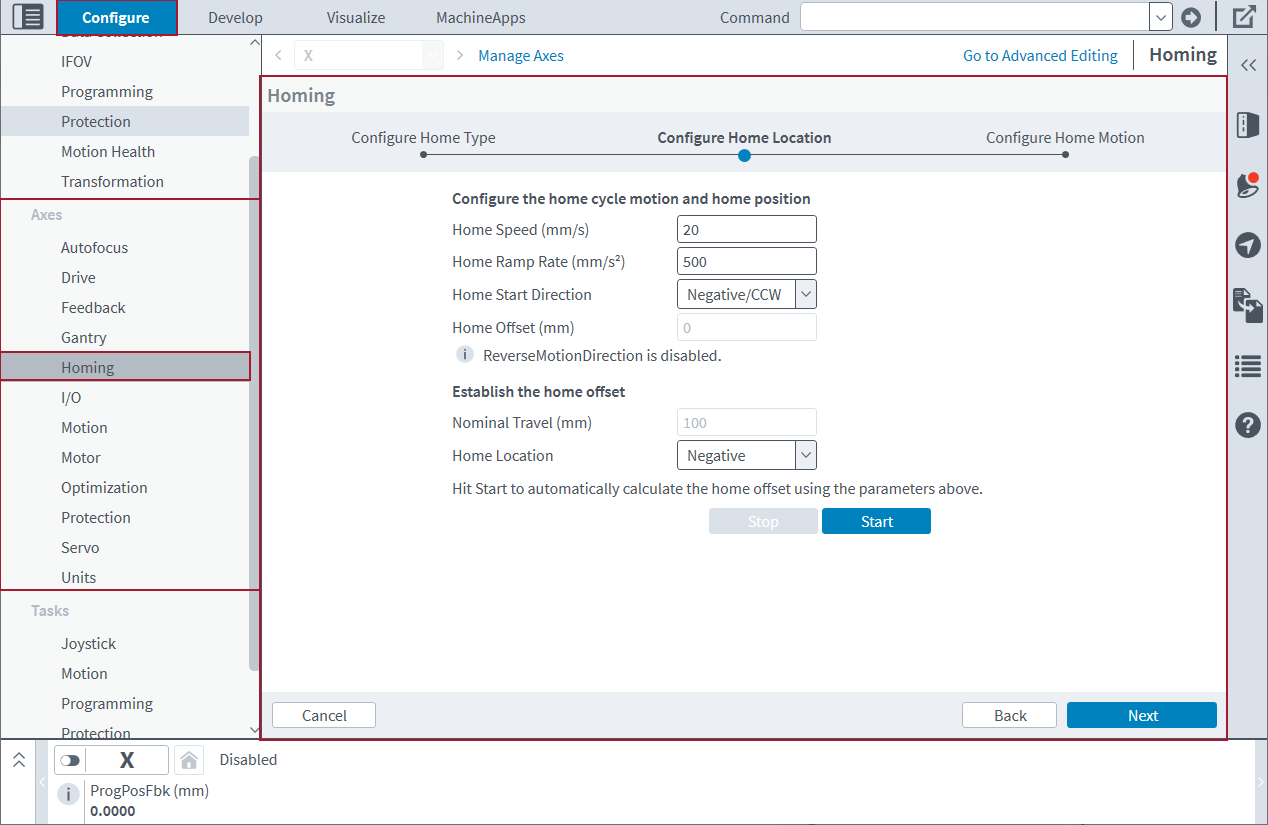
If the axis has limited travel, configure the Home Location. If you select Other, you must also configure the Program Positive Travel. The module shows the Nominal Travel of the axis for reference. If the axis has rotary unlimited travel, the module does not show these inputs.
To calculate the Home Offset, click the Start button. If the axis has rotary unlimited travel, the module tells you to move it to the desired home location. Later the module asks you to confirm that the axis is at the desired home location.
If the calculation succeeds, the module shows the calculated Home Offset. When this value is satisfactory, click Next to apply it to the controller. Then test the home cycle. For information about how to do this, refer to Configure the Home Cycle Motion.
Configure the Home Cycle Motion
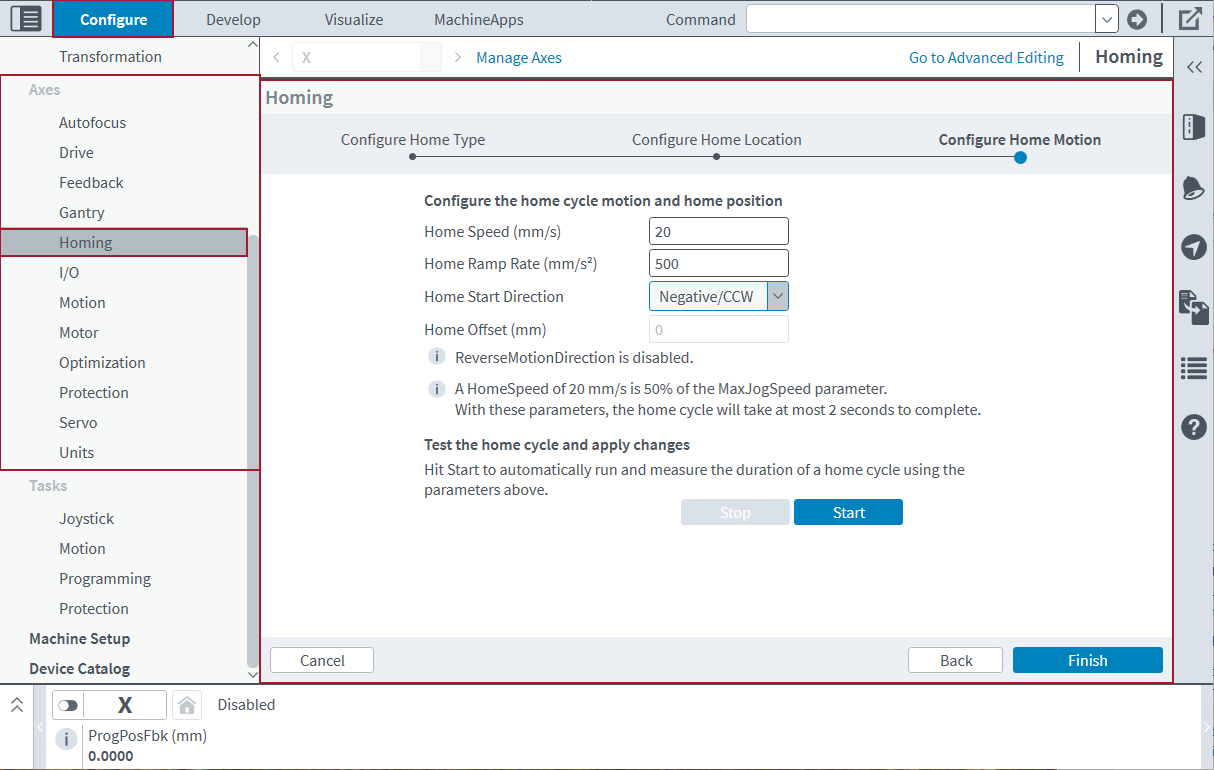
If the Home Type you select uses motion, configure the Home Speed, Home Ramp Rate, and Home Start Direction. If the Home Type you select does not require motion, the module does not show these inputs.
The Homing module indicates the percentage of the MaxJogSpeed Parameter to which the Home Speed is set. It also shows a worst-case estimate of the quantity of time that will be necessary to home the axis.
Test the home cycle with the settings you selected in the Homing module. To do this, click the Start button. If the home succeeds, the module shows the quantity of time that was necessary to home the axis.
When all the parameter values are satisfactory, click Finish to apply the new homing parameters to the controller. To keep these parameter changes active after the next controller reset, you must save them to the controller. Click Save All on the left panel of the Configure workspace.
Advanced Editing
If you must edit the


