Automation1 Status Utility Overview
Use the Automation1 Status Utility to manually monitor the controller and identify problems that can occur with a program running on a task, an axis doing motion, Industrial Ethernet, data collection, and more.
IMPORTANT: The number of axes and tasks that you can see in the Status Utility is related to which license you purchased and which application settings you configured. For information about how to change the Status Utility settings, see Change the Status Utility Settings.
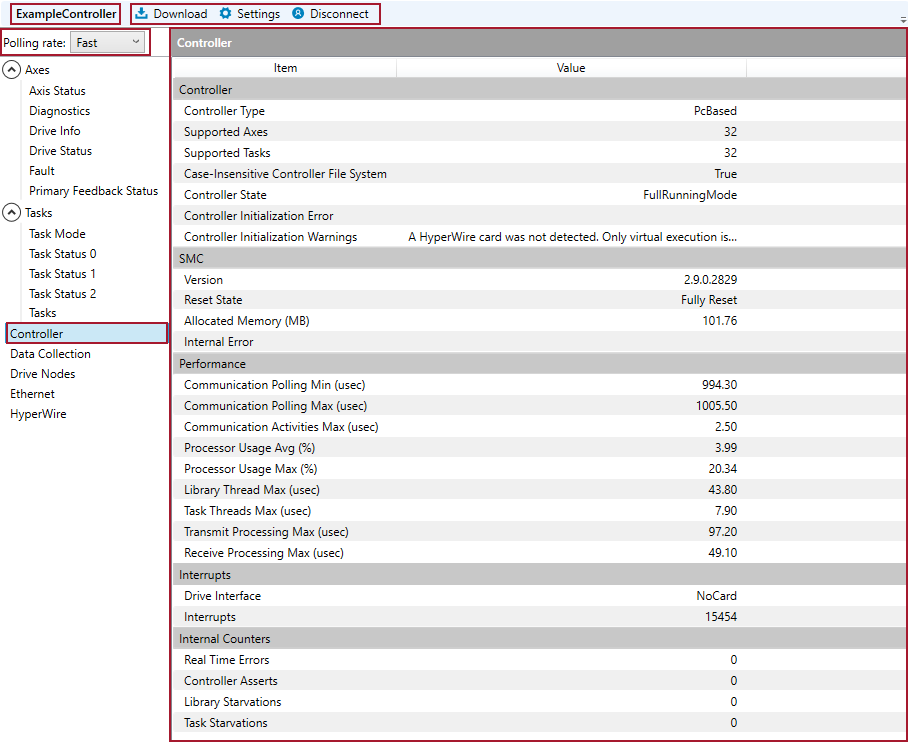
The left-hand side of the Status Utility has tabs that show status information. Click through these tabs to see status information for all of your axes, active faults, tasks, running programs, the controller to which you are connected, data collection performance, HyperWire performance, and more.
The right-hand side of the Status Utility has a data table that contains status information for the selected tab:
- When a cell in the data table is labeled "--", it shows the status item is not active.
- When a cell in the data table is labeled "ON", it shows the status item is active.
- When a cell in the data table is highlighted in blue, it shows the information is stale.
The Status Utility is a passive monitoring tool that you can use to examine the behavior of your controller. It will not start the controller for you, run an AeroScript program, or do any operation that has an effect on the state of the controller when you use it. If you open the Status Utility and connect to a controller, it is possible to see no information available and all the cells highlighted in blue. If this occurs, then your controller is not running. To see information in the Status Utility, you must open Automation1 Studio and start the controller.
IMPORTANT: The Automation1 Status Utility is an advanced debugging tool. Use this tool only if Automation1 Studio does not supply the tools necessary for you to identify a problem. When possible, Aerotech recommends that you always use Automation1 Studio to debug a problem.
Connecting to the Controller
To use the Status Utility to monitor the controller, you must first connect to the controller. To do that, see the To Manually Add a New Controller Connection procedure in Automation1 Studio.
On the top left-hand side of the application, the Status Utility will show the name of the controller to which you are connected.
To connect to a controller that is different from the one you are currently connected to, you must first click the Disconnect button at the top of the Status Utility application. Then see To Manually Add a New Controller Connection procedure in Automation1 Studio.


