Variables & I/O Module
In the Variables & I/O module of the Develop workspace, you can change the values of global and task array variables, configure analog and digital outputs, configure Industrial Ethernet connections, and add variables and I/O points to the Favorites tab.
Variables Tab
Use the Variables tab to look at and change the values of the $iglobal[ ], $rglobal[ ], and $sglobal[ ] controller global array variables. You can also change the $itask[ ], $rtask[ ], and $stask[ ] array variables for each controller task.

- In Studio, select the Develop workspace. Then find the Variables & I/O module.
- At the top of this module, select the Variables tab.
- Click the Expand button for the variable type that you want to change.
- Hover the mouse over the variable that you want to change. A Pencil icon comes into view.
- Click the Pencil icon. Then enter a new value for the variable.
- To save this change, click the Save icon.
If a controller array variable contains more than 1000 items, the application shows only the first 1000 items in the tree view. To look at the remaining items, click the Show all items… button. This button shows all items in the array on pages of 1000 items each. To move through these pages, click the First Page, Previous Page, Next Page, and Last Page buttons. You can also enter the number of the page that you want to see in the Page input control. To go back to the tree view where you can look at the full list of array variables, click the All Items button in the top left corner of the Variables tab.


When you use the Filter field to sort items in the Variables tab and there are more than 1000 items, the Page input control comes into view. You can enter the number of the page that you want to see. To move through these pages, click the First Page, Previous Page, Next Page, and Last Page buttons. To go back to the tree view where you can look at the full list of array variables, click the All Items button in the top left corner of the Variables tab.
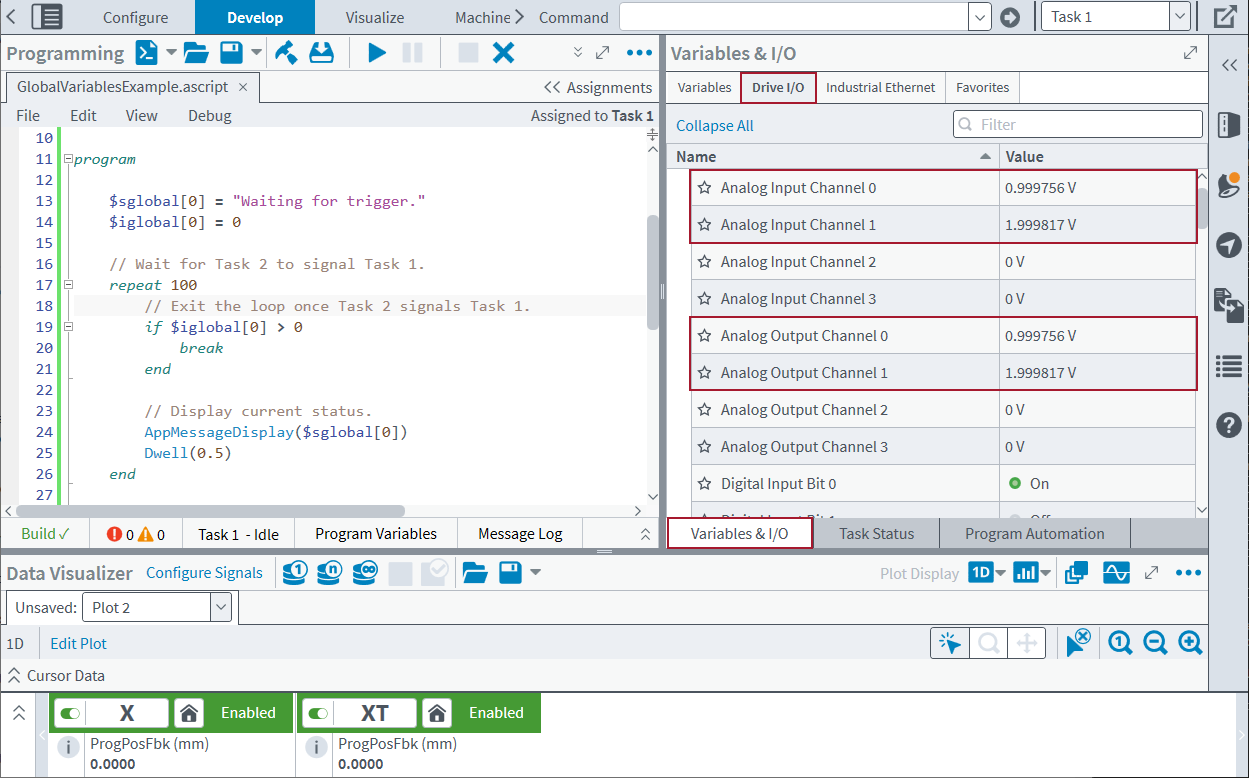
Drive I/O Tab
Use the Drive I/O tab to look at and configure analog and digital inputs and outputs. You can look at and change the values of the analog inputs and outputs on your electrical devices.
- In Studio, select the Develop workspace. Then find the Variables & I/O module.
- At the top of the module, select the Drive I/O tab.
- Click the Expand button of the axis with the analog output that you want to change.
- Hover the mouse over the analog output that you want to change. A Pencil icon comes into view.
- Click the Pencil icon. Then enter a new value for the analog output.
- To save this change, click the Save icon. The value of the corresponding analog input changes at same time.
You can also look at and change the values of the digital inputs and outputs on your electrical devices.
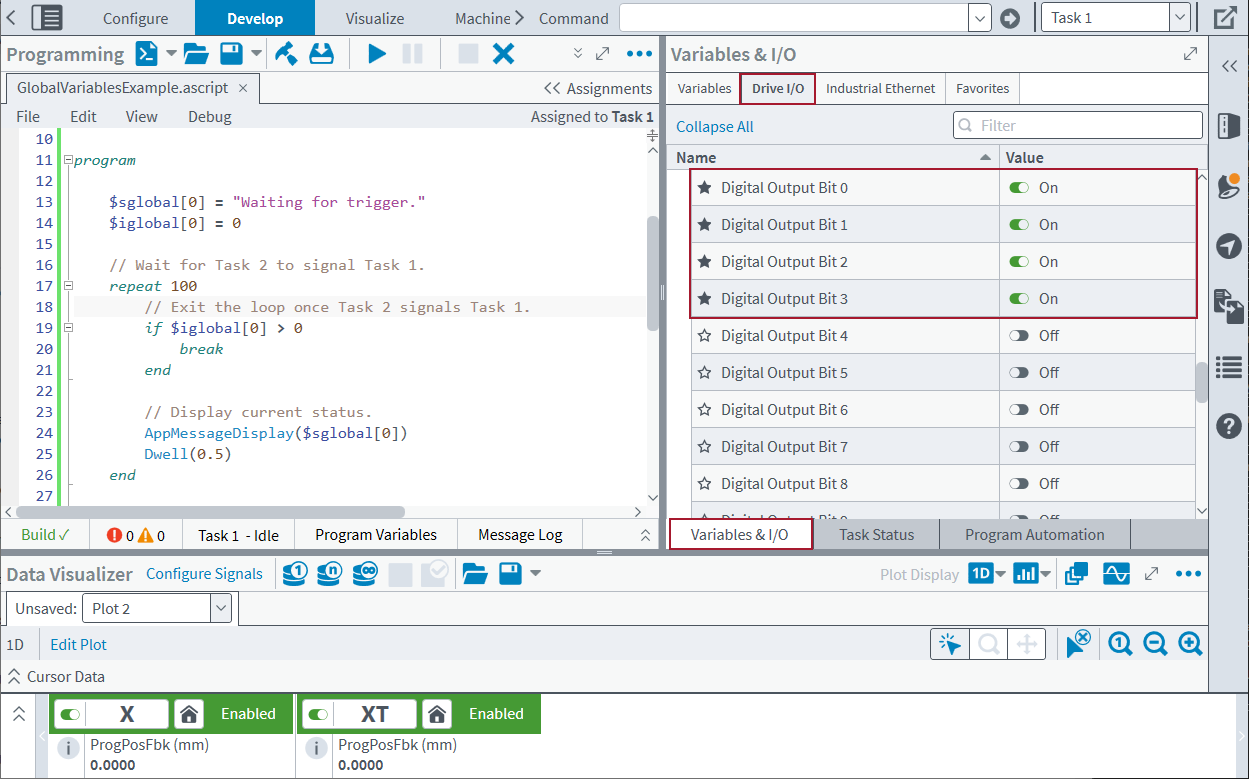
- In Studio, select the Develop workspace. Then find the Variables & I/O module.
- At the top of the module, select the Drive I/O tab.
- Click the Expand button of the axis with the digital output that you want to change.
- Find the digital output that you want to change.
- Click the toggle icon to change its value. The value of the corresponding digital input changes at the same time.
Correct an EmergencyStopFault
You can also use the Variables & I/O module to help correct an EmergencyStopFault. For information about how to do this, see Emergency Stop Fault.
Industrial Ethernet Tab
Use the Industrial Ethernet tab to configure your Industrial Ethernet connections. Refer to the procedures that follow:
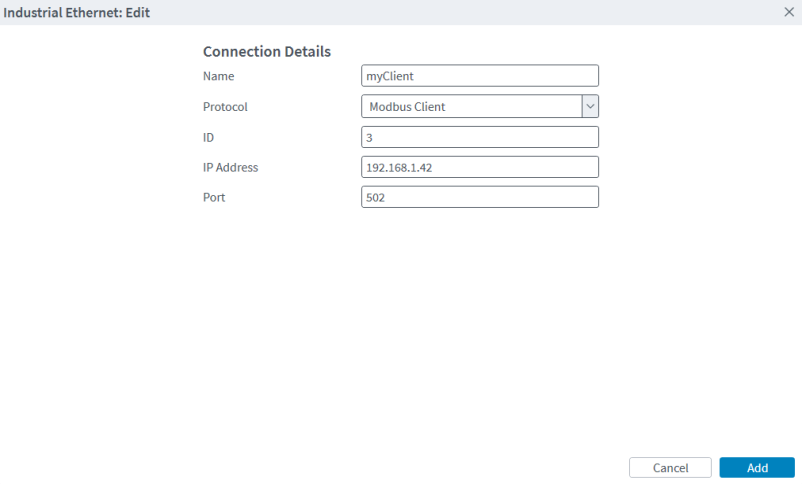
- In Studio, select the Develop workspace. Then find the Variables & I/O module.
- At the top of the module, select the Industrial Ethernet tab.
- Click the Edit button.
- The Industrial Ethernet: Edit dialog comes into view. To add a connection, click the + Connection button.
- On the Connection Details screen, complete all of the fields. Then click the Add button to add the connection. If you click the Cancel button, the application discards all of your changes and goes back to the configuration screen.
- To edit the variables of a specific connection, do the steps that follow:
- Click the expander button next to the connection name.
- Click the + button to add a variable of the specified type. You can click in the variable fields to make edits.
- If you want to remove a variable, click the trash can icon.
- On the Industrial Ethernet: Edit dialog, click the Save button. The dialog closes and the controller automatically resets to apply the configuration.
IMPORTANT: If the controller is running, you will be asked to confirm that you want to launch the Industrial Ethernet Configuration because a controller reset is required and automatically occurs after you make changes to the configuration. Click Yes to continue.
- In Studio, select the Develop workspace. Then find the Variables & I/O module.
- At the top of the module, select the Industrial Ethernet tab.
- Click the Edit button.
- In the Industrial Ethernet: Edit dialog, click the Details link next to the connection that you want to edit.
- On the Connection Details screen, edit the properties of the connection.
- Click Save to save your changes.
- To edit the variables of a specific connection, do the steps that follow:
- Click the expander button next to the connection name.
- Click the + button to add a variable of the specified type. You can click in the variable fields to make edits.
- If you want to remove a variable, click the trash can icon.
- On the Industrial Ethernet: Edit dialog, click the Save button. The dialog closes and the controller automatically resets to apply the configuration.
IMPORTANT: If the controller is running, you will be asked to confirm that you want to launch the Industrial Ethernet Configuration because a controller reset is required and automatically occurs after you make changes to the configuration. Click Yes to continue.
- In Studio, select the Develop tab. Then find the Variables & I/O module.
- At the top of the module, select the Industrial Ethernet tab.
- Click the Edit button.
- In the Industrial Ethernet: Edit dialog, click the Details link next to the connection that you want to remove.
- In the bottom-left corner of the Connection Details screen, click the Remove Connection button to remove the connection.
- On the Industrial Ethernet: Edit dialog, click the Save button. The dialog closes and the controller automatically resets to apply the configuration.
IMPORTANT: If the controller is running, you will be asked to confirm that you want to launch the Industrial Ethernet Configuration because a controller reset is required and automatically occurs after you make changes to the configuration. Click Yes to continue.
You can also use the Industrial Ethernet tab to do the operations that follow:
Configure the Network Interface
For information about how to configure the network interface, see IP Configuration.
Create a Modbus Connection
For information about how to create a connection that lets you enable the Modbus Client or Server on the controller, see Create a Modbus Connection.
Configure the EtherCAT Mappings
Before you enable EtherCAT, you must configure the EtherCAT mappings. For information about how to do this, see Configure EtherCAT Mappings.
Create an EtherNet/IP Adapter Connection
For more information about creating a connection that lets you enable the EtherNet/IP adapter on the controller, see Create an EtherNet/IP Adapter Connection.
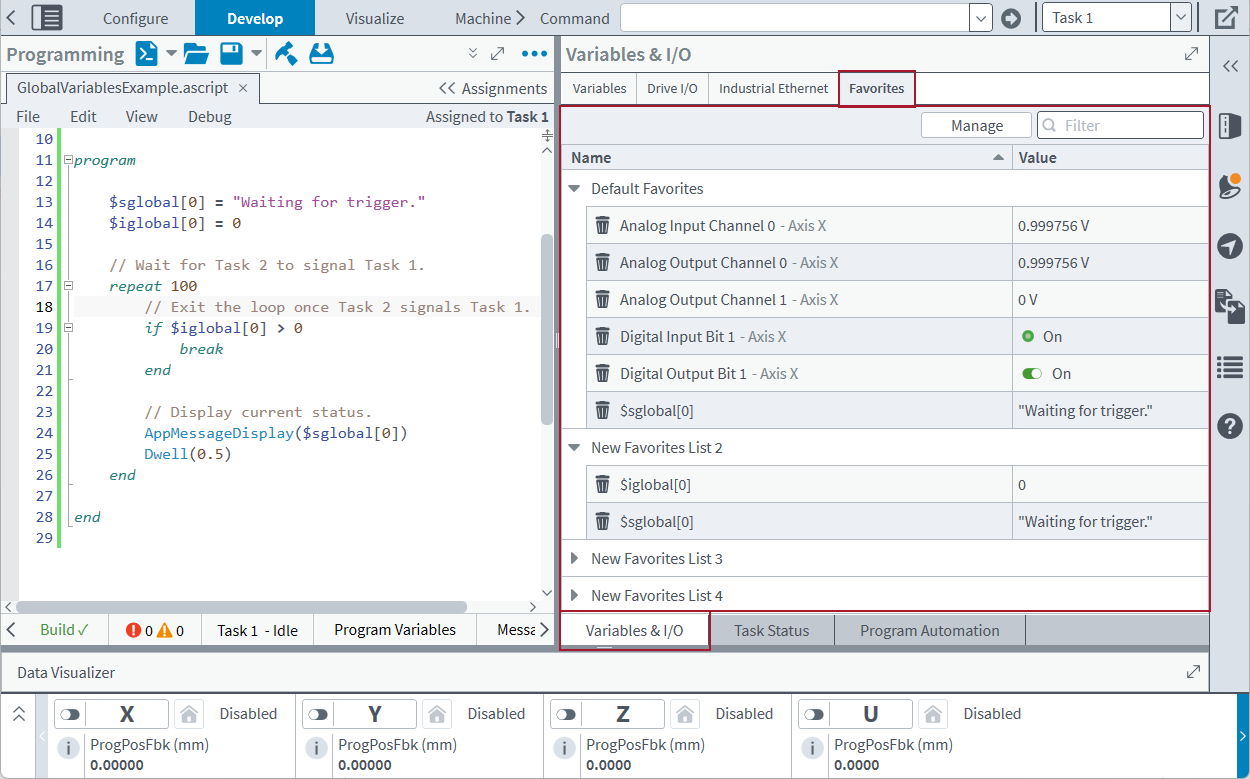
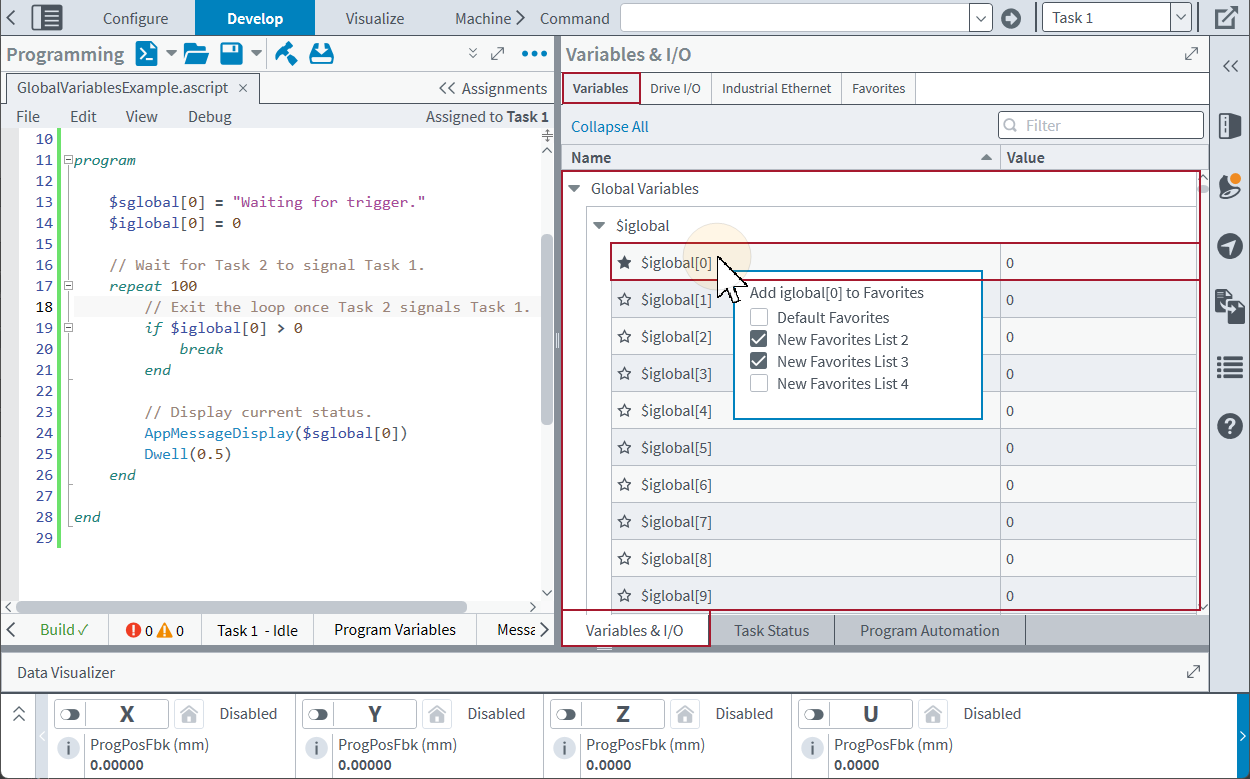
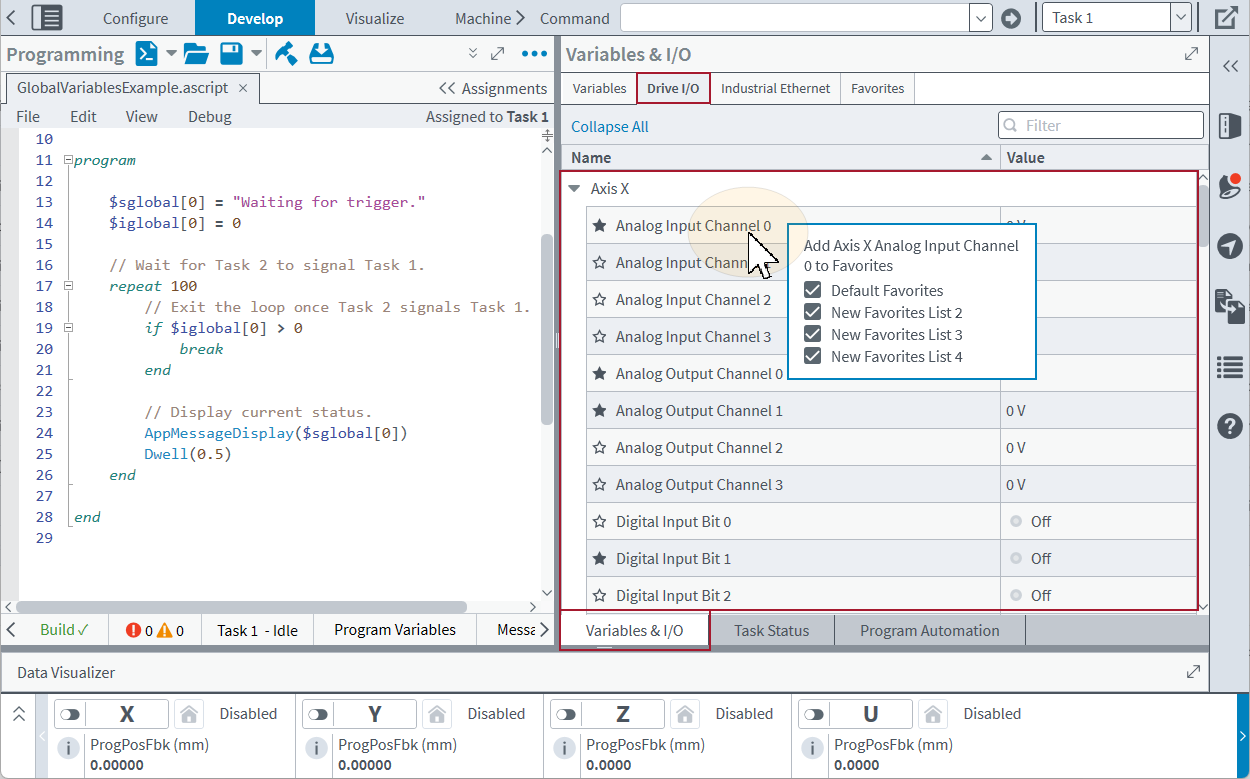
Favorites Tab
Use the Favorites tab to keep track of the variables and I/O points that are most important to your project.
- In Studio, select the Develop workspace. Then find the Variables & I/O module.
- At the top of this module, select the Variables tab.
- Click the Expand button for the variable type that you want to add to the Favorites tab.
- Do one of the options that follow:
- To quickly add the
- To add the
- Select the Favorites tab and expand the list. The variables in each list will come into view.
Tip: The Favorites tab shows the favorites lists in alphabetical order. The Manage Favorite Lists dialog shows the first favorites list as the one to which you can add
- In Studio, select the Develop workspace. Then find the Variables & I/O module.
- At the top of this module, select the Drive I/O tab.
- Click the Expand button adjacent to the axis for which you want to add I/O points to the Favorites tab.
- Do one of the options that follow:
- To quickly add the
- To add the
- Select the Favorites tab and expand the lists. The I/O points in each list will come into view in the tab.
Tip: The Favorites tab shows the favorites lists in alphabetical order. The Manage Favorite Lists dialog shows the first favorites list as the one to which you can add
To filter the favorites items, enter the item name into the Filter box.
To delete a variable or I/O point from a list in the Favorites tab, click the Trash Can icon that is adjacent to its name.
Manage Your Favorites Lists
Use the Manage Favorites Lists dialog to add, rename, and remove favorites lists. To open this dialog, select the Favorites tab. Then click the Manage button.
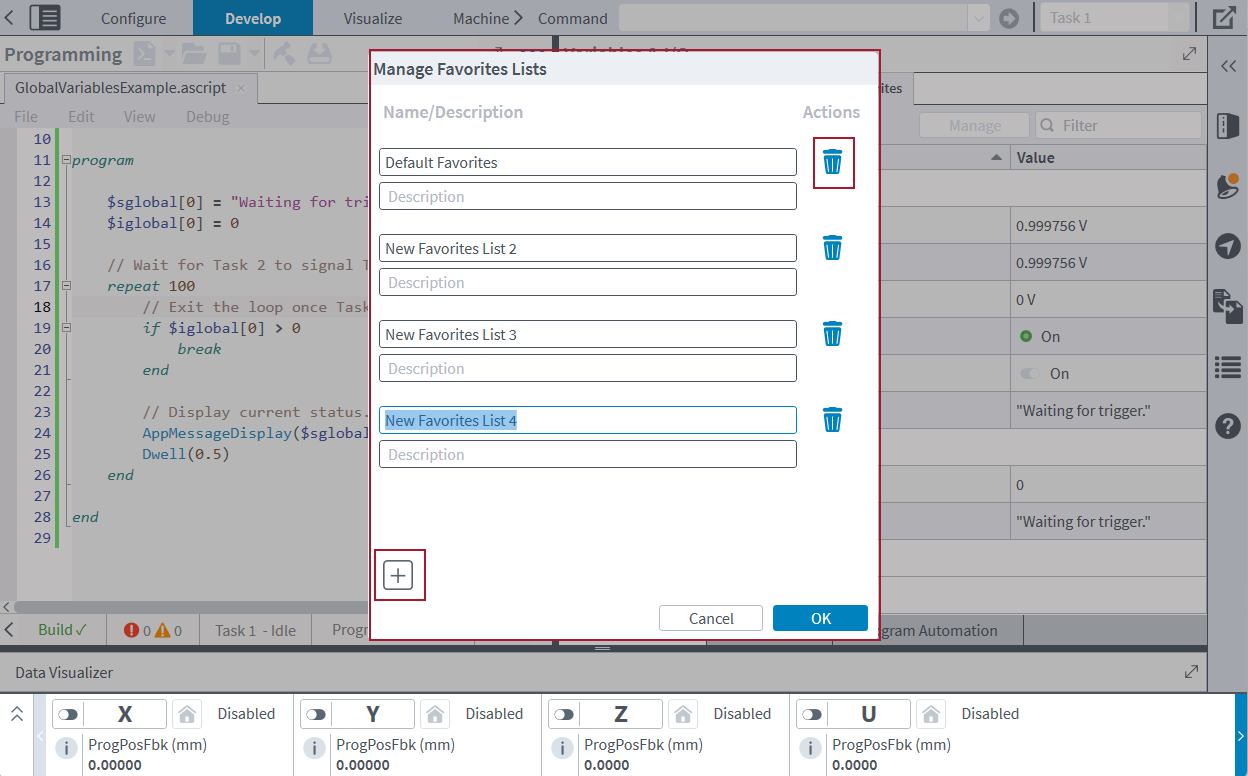
- In Studio, select the Develop workspace. Then find the Variables & I/O module.
- At the top of this module, select the Favorites tab.
- Click the Manage button. The Manage Favorites Lists dialog comes into view.
- Click the Add button. A new list is created.
- Click OK to close the dialog.
- In Studio, select the Develop workspace. Then find the Variables & I/O module.
- At the top of this module, select the Favorites tab.
- Click the Manage button. The Manage Favorites Lists dialog comes into view.
- Use this dialog to change the names and descriptions of any favorites list.
- Click OK to close the dialog.
- In Studio, select the Develop workspace. Then find the Variables & I/O module.
- At the top of this module, select the Favorites tab.
- Click the Manage button. The Manage Favorites Lists dialog comes into view.
- In the Actions column, click the Remove Favorites List button adjacent to the favorites list you want to remove.
- Click OK to close the dialog.
Changing the Module Layout
You can change the size of the module when you click and drag the border with other modules in the workspace.
In the top-right part of the module header, click the Expand button  to let the module fill all of the workspace area. While it is expanded, you can click the Restore button
  to let the module go back to its original size.


