EasyTune Module
The EasyTune module automatically does a series of axis identification and servo parameter optimization steps on the selected axis with minimum user input necessary. You can find this module in the
The output of EasyTune is equivalent to the servo optimization that is done by an experienced controls engineer. If EasyTune completes successfully, it is not necessary for you to use the other tuning tools unless your application requires very low tracking errors for high-dynamic motion. When you use EasyTune, it is not necessary for the selected axis to be stable or enabled.
If the EasyTune module shows a message that tells you EasyTune does not support the selected axis, move directly to the Repeated Failures path of the
Each time that you run EasyTune, a log file is automatically saved to the EasyTune directory in your User Files directory.
- Open Automation1 Studio.
- In the Axes category of the Configure workspace, select the Servo topic. Then make sure that you are in the Basic Editing mode.
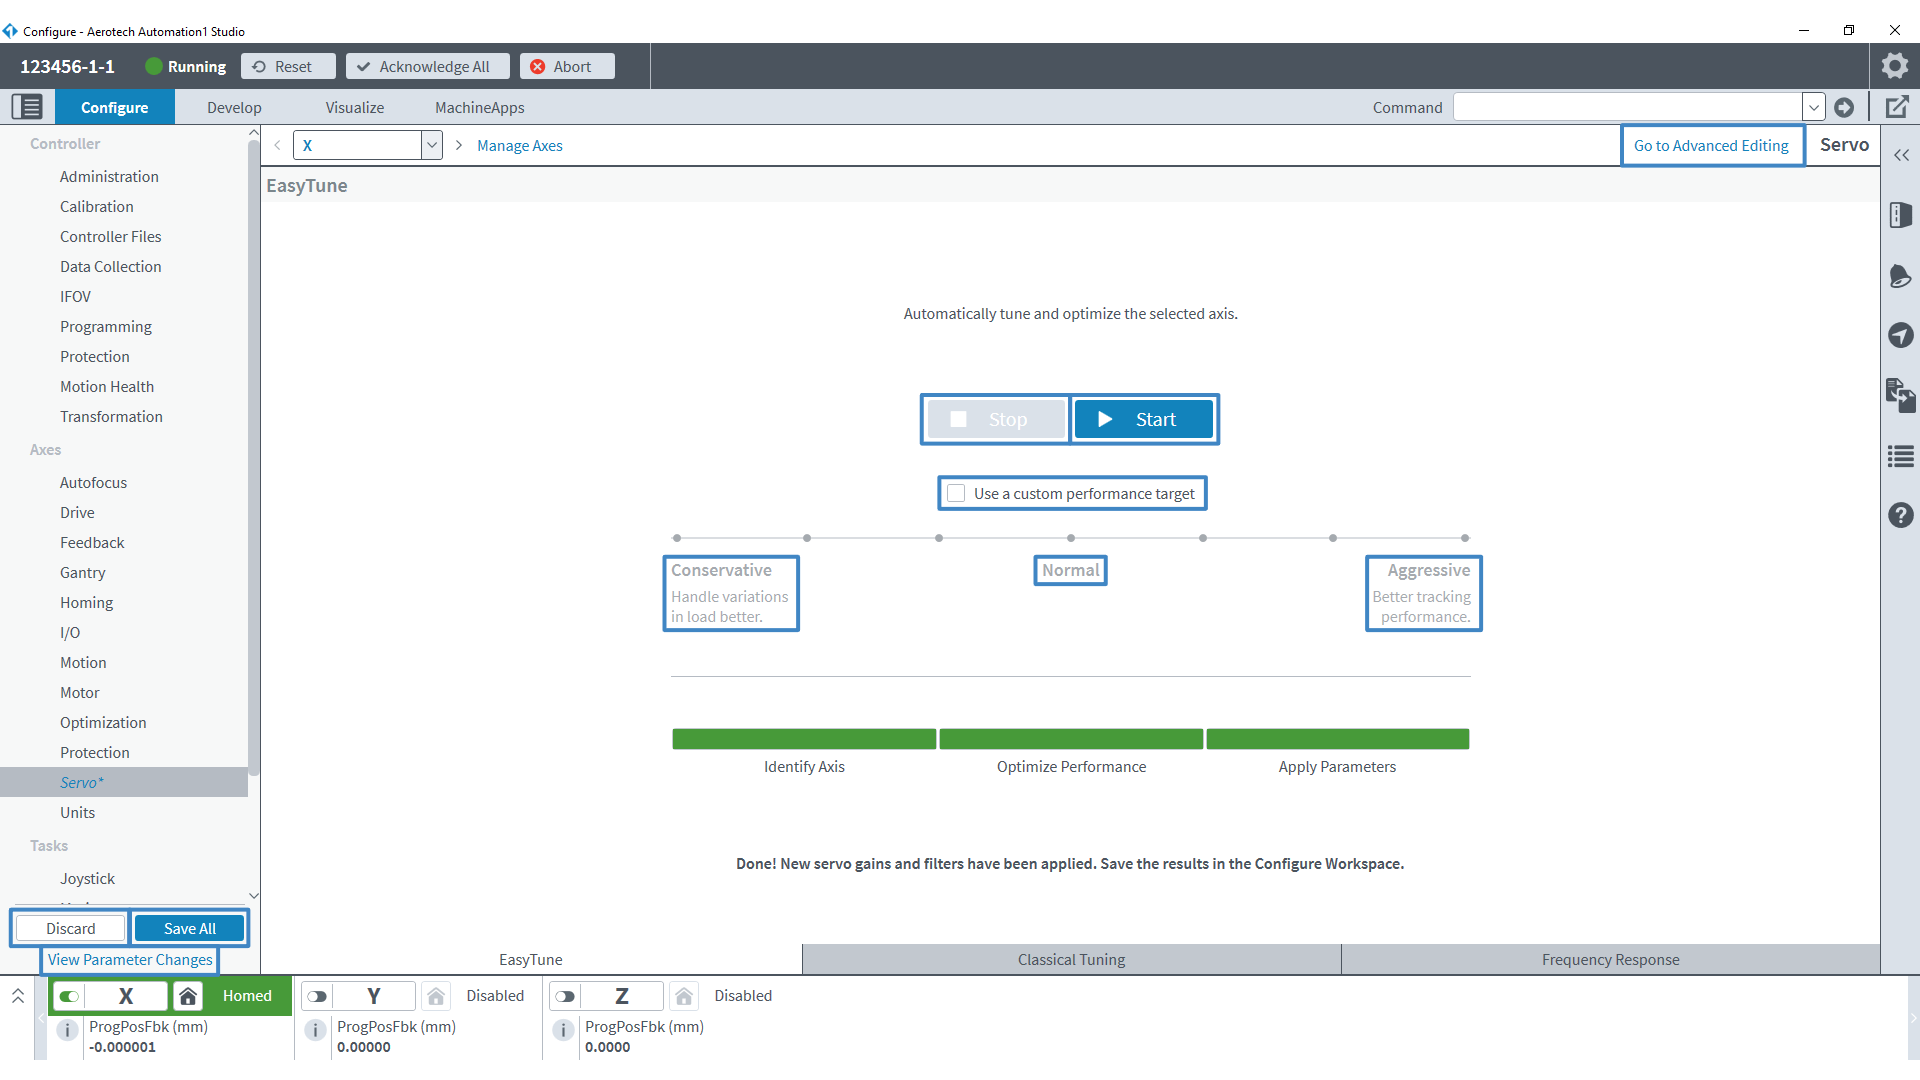
- At the bottom of the application, select the EasyTune module.
- At the top of the module, click the drop-down arrow to select the axis that you want to configure.
- To specify a performance target, select the
 Use a custom performance target box.
 - Select the performance target that you want to use, which includes Conservative, Normal, and Aggressive. Aerotech recommends that you start with a value of Normal for the first time that you run EasyTune.
- Click the Start button


- EasyTune might ask you to specify more information about the motion to help identify the selected axis. If a dialog box comes into view, enter a Travel Distance (primary units) and Travel Speed (primary units / second) for the axis.
- When EasyTune is completed, the optimized servo gains and servo filters are automatically applied to the controller. Test the performance of the selected axis.
- If necessary, change the performance target. If the axis is slow when it moves into position, try a more aggressive performance target. If the axis overshoots when it moves into position, try a more conservative performance target.
- Click the Start button
- When the performance of the selected axis is satisfactory, click the Save All button on the bottom-left corner of the application. This makes sure that the updated parameters will have an effect after the next controller reset.
EasyTune Recipe Files
The EasyTune module can also run custom-tuning recipes that Aerotech supplies with the .etr extension. For conditions where the default EasyTune behavior is not satisfactory, these files will supply an alternative behavior.
IMPORTANT: Aerotech supplies EasyTune recipe files only for specific conditions. If you do not have one or more EasyTune recipe files (.etr), do not enable this setting.
- Open Automation1 Studio.
- In the Axes category of the Configure workspace, select the Servo topic. Then make sure that you are in the Basic Editing mode.
- At the bottom of the application, select the EasyTune module.
- On the top-right of the module, select the Menu
 button. Then click Settings.
 - In the EasyTune section of the Settings dialog, enable the Allow Custom Tuning Recipes button. Then close the dialog.
- In the Custom Tuning Recipe section at the bottom of the EasyTune module, click the pencil icon.
- Select the .etr file that Aerotech supplied to you. After you select the file, it becomes active in the application.
IMPORTANT: If you move the uploaded .etr recipe file to a different location on your PC, Automation1 Studio will tell you that it cannot find the file. It also clears the selected recipe file from the application.
Recipe files can define behavior for one or more axes. In the Configure workspace, a recipe will run on the selected axis only if that axis is defined in the recipe file. EasyTune will behave normally on a selected axis that is not defined in the recipe file.
Recipe files can run on two or more axes at the same time. If you have a recipe file with two or more defined axes, the EasyTune module will show each axes that has motion commanded on it when the recipe operates on that selected axis.
Troubleshoot EasyTune
EasyTune does not always complete successfully. The table that follows shows common issues that might occur and how you can try to correct them.
| Error Message | Solution |
|---|---|
|
EasyTune cannot identify the axis. |
Before you start EasyTune, make sure that you are getting valid position feedback from the selected axis. |
|
EasyTune cannot complete because the controller generated an axis fault. |
If the axis fault is an End-Of-Travel Limit fault or a Software Limit fault, make sure the axis is away from all the limits. Then click the Start button |
|
If the axis fault is a Maximum Velocity Command Fault, increase the values of |
|
|
If the axis fault is a |
|
|
If the axis fault is an |
|
|
EasyTune cannot optimize the axis. |
If it is safe to continue, click the Start button |


