Access Control
Automation1 Access Control lets you configure your Automation1 controller to put a limit on the number of users who can get access to it. Access control specifies a list of users that are permitted to connect to your controller and a list of users that are permitted to manage the controller as administrators.
Enable access control if you want to let a specific group of users connect to your controller or if you want to let a specific group of users do the administrator-only tasks that follow:
- Examine and change the access control configuration.
- Download and upload a Machine Controller Definition file.
- Manage the Automation1 license keys.
- Update software.
Requirements for PC-Based Controllers
To use access control, you must install the Automation1-MDK and the Automation1-iSMC on computers that have access to the same Windows Active Directory instance. You can use the same computer. You can also use local Windows accounts as an alternative to a Windows Active Directory instance if the Automation1-MDK and Automation1-iSMC obey the conditions that follow:
- They are installed on the same computer.
- The computer does not have access to a Windows Active Directory instance.
You can configure Automation1 Access Control in Automation1 Studio. When you configure access control, your Windows account will be added automatically with the Admin permission. One Admin must be configured at all times. Thus, you will not be able to delete your own account from Access Control. If it is necessary for you to delete your account, a different configured user with the Admin permission must do this.
IMPORTANT: Before you configure and enable Automation1 Access Control, make sure that you have a process to recover your Windows accounts.
If you forget your user name or password, recover this information by doing one of the options that follow:
- Use the instructions supplied by your IT department.
- If you are using local Windows accounts, use the standard Windows procedures.
Requirements for Drive-Based Controllers
You can configure Automation1 Access Control in Automation1 Studio. When you configure access control, you create a user that will be automatically added with the Admin permission. One Admin must be configured at all times. Thus, you will not be able to delete your own account from Access Control. If it is necessary for you to delete your account, a different configured user with the Admin permission must do this.
Access Control Recovery for Drive-Based Controllers
IMPORTANT: Before you enable Automation1 Access Control, make sure that you select a device recovery type and have a process to enter Access Control Recovery Mode.
Access Control Recovery is a mechanism for you to recover access to the controller if all the controller passwords are lost and you cannot find them. Aerotech recommends that you configure the port you do not typically use. If you usually use the controller over Ethernet, select USB for the Access Control Recovery Port. If you usually use the controller over USB, select Ethernet for the Access Control Recovery Port. This helps make sure that you do Access Control Recovery only when necessary.
If you forget your user name or password, you can recover access to the drive-based controller. Do the applicable step that follows:
- If the configured Access Control Recovery Port is USB, disconnect the Ethernet cable from the drive. Then use a USB cable to connect to the controller.
- If the configured Access Control Recovery Port is Ethernet, disconnect the USB cable from the drive. Then use an Ethernet cable to connect to the controller.
You will be able to connect to the controller without using a user name and password. Then you can do administrative-only tasks. To create a new user name and password that will be added with the Admin permission, refer to the applicable procedure to configure Access Control. Then restore Ethernet or USB connections to the drive.
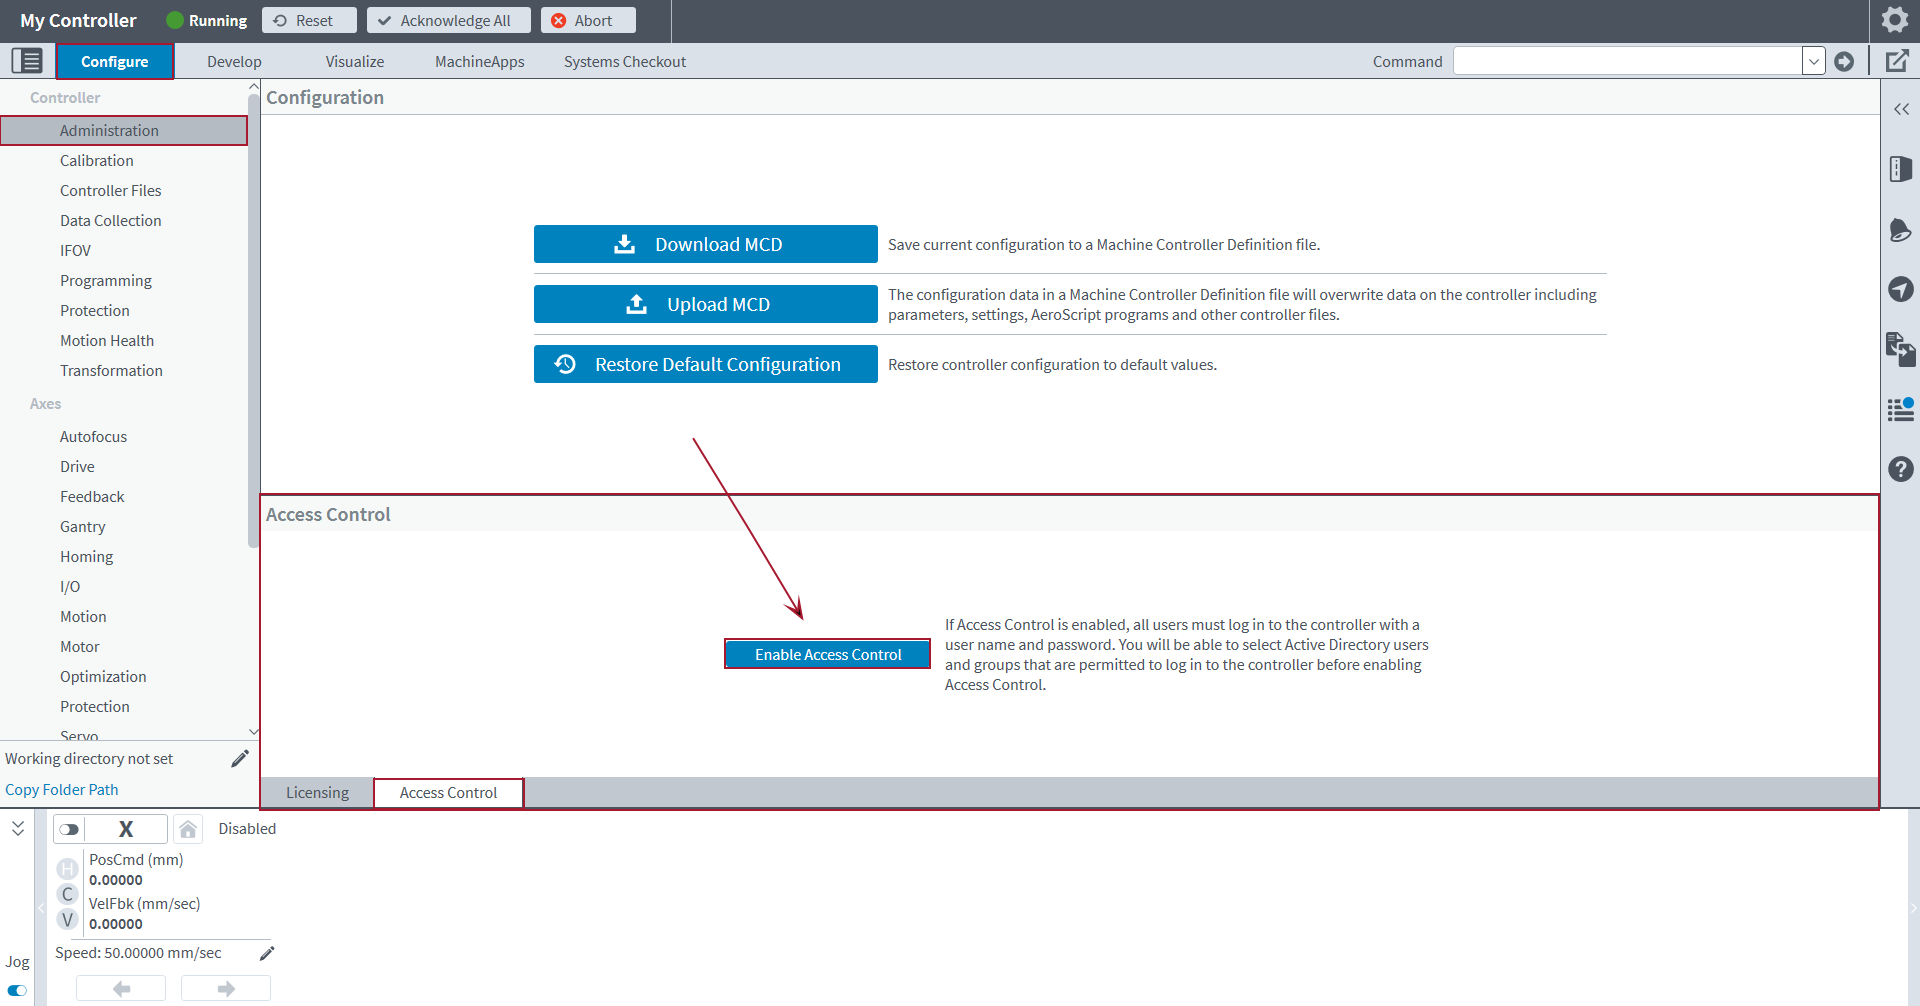
- Open Automation1 Studio. Then select the Configure tab.
- On the Controller menu, select Administration.
- At the bottom of the application, select the Access Control tab. The Access Control section comes into view.
- In the Access Control section, click the Enable Access Control button. The Launch Access Control? dialog comes into view.
- In the Launch Access Control? dialog, click Yes to continue.
- Enter your Windows Active Directory User Name and Password. Click OK.
- Click the + Groups or + Users button to add groups and users. A list of Windows Active Directory groups and users comes into view. After you select all the applicable groups and users, click Add Selected. The groups and users come into view on the list. Assign the groups and users to the Access Control permissions as necessary.
- To remove a user or group, click the Remove button.
- When you are done adding users and groups, click Enable.
IMPORTANT: Access Control that is configured for a specific Windows Active Directory instance does not operate correctly if one of the conditions that follows occurs:
- You move the Automation1-iSMC to a different domain controller.
- You apply the same Access Control configuration to an Automation1-iSMC that has access to a different domain controller.
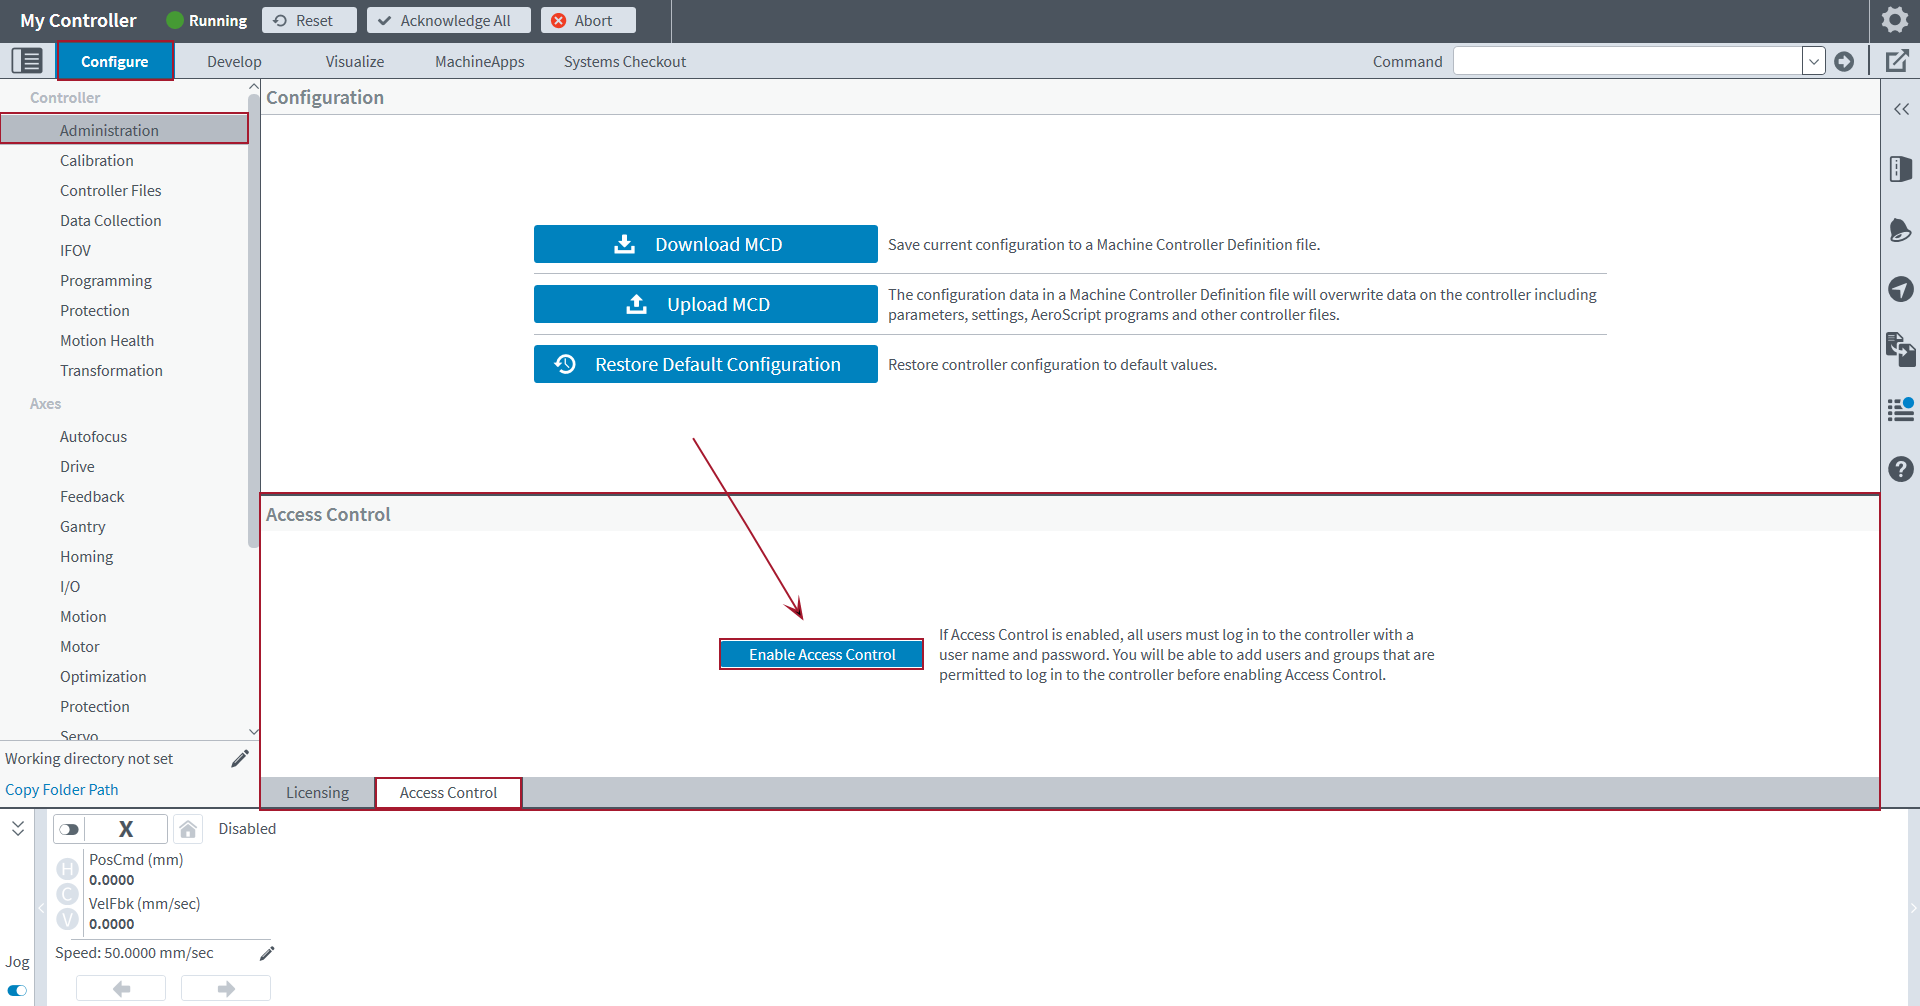
- Open Automation1 Studio. Then select the Configure tab.
- On the Controller menu, select Administration.
- At the bottom of the application, select the Access Control tab. The Access Control section comes into view.
- In the Access Control section, click the Enable Access Control button. The Launch Access Control? dialog comes into view.
- In the Launch Access Control? dialog, click Yes to continue.
- Enter a User Name and Password for the initial Admin user. Click OK to continue.
- The Change Access Control Recovery Port dialog comes into view. In this dialog, you can change which port is selected for Access Control Recovery. Click OK to continue.
- Click the + User button to create a new user. The Add User dialog comes into view. Enter a User Name and Password for the user. Click Add. The user comes into view on the list. Assign the user to the Access Control permissions as necessary.
- To change the User Name or set the Password of a user, click Manage.... The Edit User dialog comes into view. When you are done, click Save.
- Click the + Group button to create a new group. The Add Group dialog comes into view. Enter a Name for the group and select Users to add to the group. Click Add. The group comes into view on the list. Assign the group to the Access Control permissions as necessary.
- To change the Name or Users of a group, click Manage.... The Edit Group dialog comes into view. When you are done, click Save.
- To remove a user group, click the Remove button.
- When you are done creating users and groups, click Enable.
IMPORTANT: You cannot change the User Name of the user to which you are logged in. This action must be done by a different Admin user. But any user can change their own password. Refer to the To Change Your Password on a Drive-Based Controller section for more information.
IMPORTANT: Access Control information will be stored on the drive-based controller. While there are security mechanisms that prevent access to this data, it is also important to make sure the controller is secure. See Securing Your Automation1 Controller for more information.
- Open Automation1 Studio.
- On the right-hand side of the application, click Expand to open the sidebar. On the top-left part of the sidebar, select the Controller tab.
- Your User Name is shown. Click the Set Password... button to open the Change Password dialog.
- Enter your current password and the new password.
- Click OK to set the new password.
Export Access Control from Drive-Based Controllers
Automation1 supports exporting access control data from a drive-based controller using an MCD file. This feature is helpful when you want to set the same access control configuration on more than one controller. If access control is configured on a drive-based controller, you can select to include it when you download an MCD file. If you select the option to include access control, you will be asked to give a passphrase that will be used to encrypt the access control data that is in the MCD file. You can then store the MCD file as a backup or upload it to another drive-based controller. When you upload the MCD file, if you choose to also upload the access control data, you must give the same passphrase to decrypt the access control data. For more information on how to export access control, see How to download an MCD file and How to upload an MCD file in Machine Controller Definition Files.
IMPORTANT: You can only export access control on a drive-based controller.
The table that follows includes a list of permissions available to configure in access control.
Table: Access Control Permissions
| Permission | Description | Notes |
|---|---|---|
|
Controller / APIs |
Allows access to log in to the controller using an API call. | This permission is automatically granted to all users configured in Access Control and is necessary for the other permissions. Delete a group or user from Access Control to remove this permission. |
|
Studio / Console |
Allows access to log in to Studio and Console. |
N/A |
|
MachineApps - All |
Allows access to all MachineApps. |
This permission automatically allows access to all current MachineApps and MachineApps that are created after Access Control is configured. |
|
MachineApps - Custom or None |
Allows access to specific MachineApps. | This permission does not automatically allow access to MachineApps that are created after Access Control is configured. |
|
Admin |
Allows access to administrator tasks in Studio and Console. |
This permission automatically allows all other permissions when selected. |
IMPORTANT: Aerotech recommends that you configure your groups to include only users that should be granted a specified set of permissions. This is because Access Control in Automation1 uses an additive approach for determining user access levels and does not use an order of precedence for applying permissions. If a permission is unchecked, it does not mean that the permission will be explicitly denied.
If you change the access control configuration while a user is connected to the Automation1 controller, changes to their assigned permissions have an effect only after they disconnect from the controller and connect again.


