USB Driver Installation
IMPORTANT: The information on this page applies only to drive-based controllers.
To communicate with a drive-based controller that uses USB, you might have to install a different USB driver.
Automation1 Version 2.2 and Higher
If you use USB to communicate with a drive-based controller that has Automation1 version 2.2 or higher, it is not necessary to install a different USB driver.
- Use a USB cable to connect the drive-based controller to your PC.
- Power off the drive-based controller.
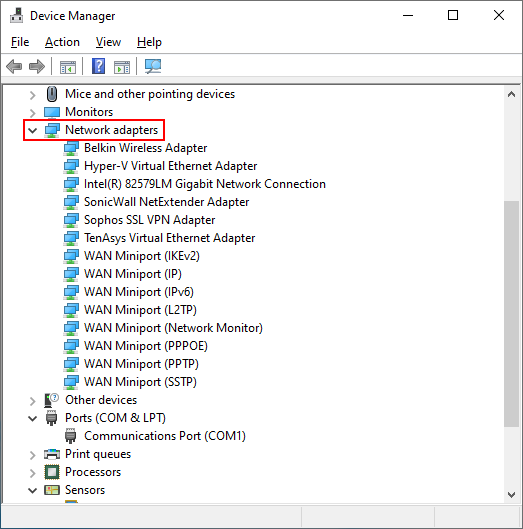
- On your PC, open Device Manager. Expand the Network adapters section.
- Power on the drive-based controller. Device Manager refreshes automatically when Windows detects the drive-based controller.
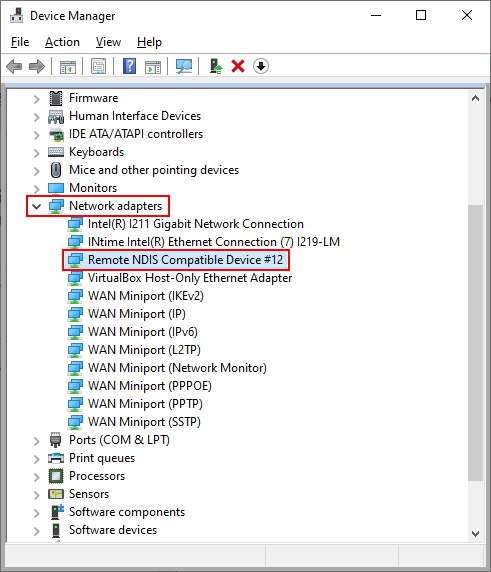
- If Device Manager now shows Remote NDIS Compatible Device, your PC has the correct driver.
- To make sure that the driver is correct, do the steps that follow:
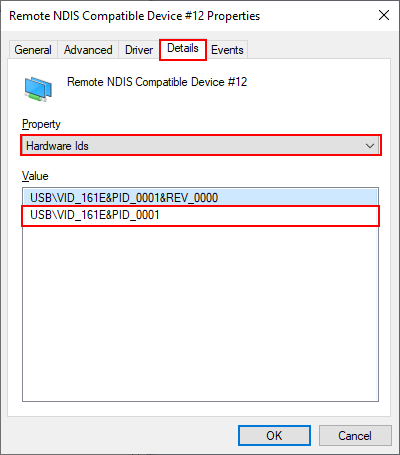
- In Device Manager, right-click the Remote NDIS Compatible Device and select Properties.
- In the Properties dialog that comes into view, select the Details tab.
- In the Property drop-down, select Hardware Ids. If the dialog shows USB\VID_161E&PID_0001, you have the correct driver on your PC.
- Click OK to close the dialog.
Automation1 Version 2.1 and Lower
If you use USB to communicate with a drive-based controller that has Automation1 version 2.1 or lower, it might be necessary to install a different USB driver.
- Use a USB cable to connect the drive-based controller to your PC.
- Power off the drive-based controller.
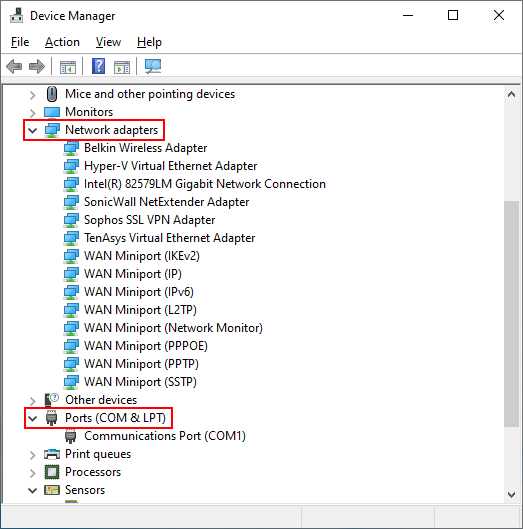
- On your PC, open Device Manager. Expand the Network adapters and Ports (COM & LPT) sections.
- Power on the drive-based controller. Device Manager refreshes automatically when Windows detects the drive-based controller.
- Based on the information that you see in Device Manager, do one of the options that follow:
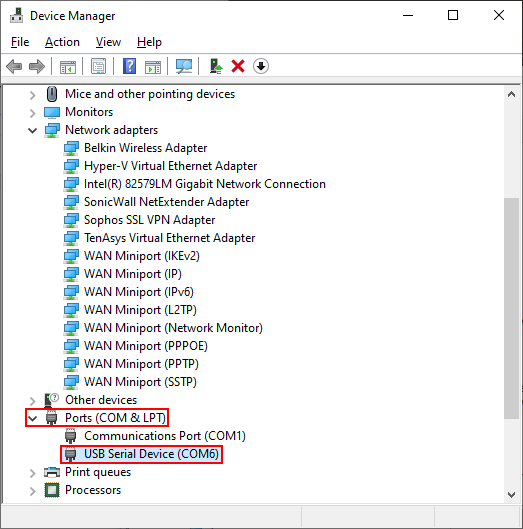
- If Device Manager now shows USB Serial Device, you do not have the correct driver on your PC. Refer to the How to install the correct USB driver section of this page.
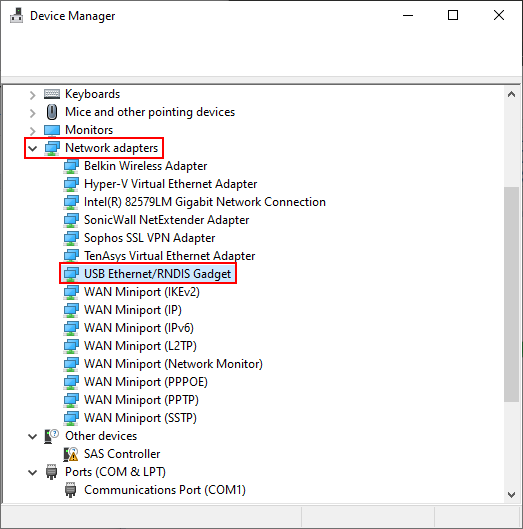
- If Device Manager now shows USB Ethernet/RNDIS Gadget, your PC has the correct driver. You do not need to do anything else. This procedure is complete.
- Disconnect the USB cable from the drive-based controller.
- Power off the drive-based controller.
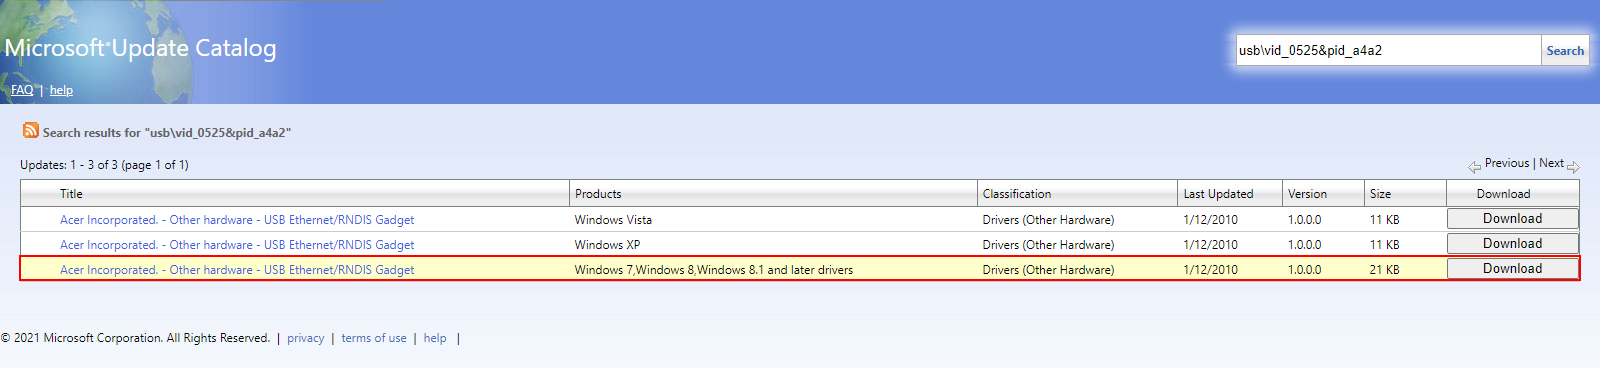
- Go to the Microsoft Update Catalog page for the Acer Incorporated. - Other hardware - USB Ethernet/RNDIS Gadget driver.
- Download the driver for Windows 7, Windows 8, Windows 8.1 and later drivers.
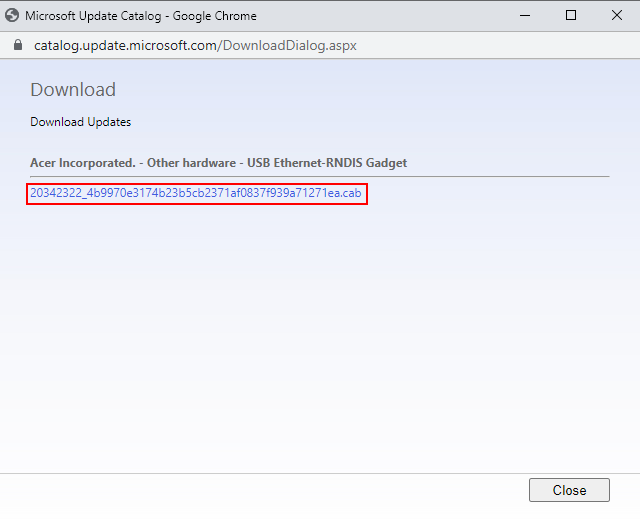
- A window comes into view. Right-click the link in the window and select Save Link As.... Then select a location to save the file to.
- Open the file that you downloaded.
- Extract the rndis.cat and RNDIS.inf files. Then go to the location of the extracted files.
- Right-click RNDIS.inf and select Install. If a security warning window comes into view, click Open. You will see an alert when the driver is installed.
- Connect the USB cable to the drive-based controller.
- Power on the drive-based controller.